
Table of Contents
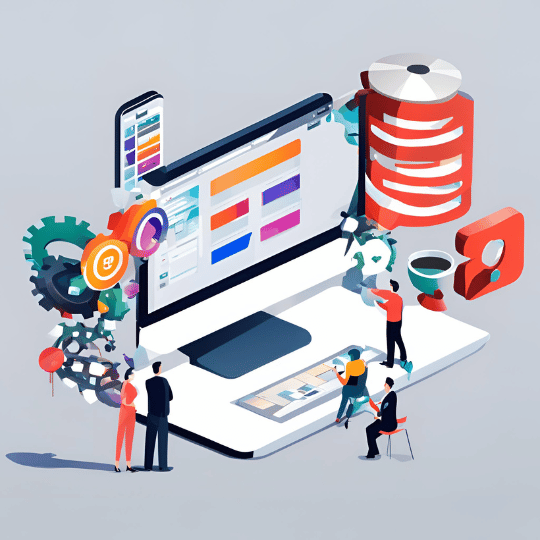
Introduction to Prototyping
Prototyping is an important stage in the product development lifecycle, acting as a link between conceptualization and the finished product. A prototype is essentially a product’s early form, allowing designers and developers to experiment with concepts, test functionality, and detect potential concerns. This iterative approach to innovation aids in the refinement of concepts and ensures that the final product fulfills user requirements and expectations.
The importance of prototyping cannot be overstated. It provides a tangible representation of an idea, facilitating better communication among stakeholders, including designers, developers, and clients. By testing a prototype, teams can gather valuable feedback, make informed decisions, and reduce the risk of costly mistakes later in the project. Prototyping also accelerates the development process by enabling rapid experimentation and adjustment.
There are several types of prototypes, each serving different purposes and stages of development:
Low-fidelity prototypes: These are basic, often hand-drawn representations of a product. They are quick and inexpensive to create, making them ideal for early-stage brainstorming and conceptualization.
High-fidelity prototypes: These are more detailed and interactive models that closely resemble the final product. They are typically created using advanced tools and software, providing a more accurate representation for usability testing and stakeholder presentations.
Prototyping is widely used across various industries. In software development, prototypes help in visualizing user interfaces and testing user experience flows. In manufacturing, physical prototypes are created to evaluate the design and functionality of new products. The design industry relies heavily on prototypes to experiment with different materials and forms before finalizing a product.
Understanding the fundamentals of prototyping and its applications across different fields is essential for any product development team. By integrating prototyping into their workflow, teams can enhance collaboration, streamline development, and ultimately deliver better products.
Identifying the Problem and Setting Goals
Creating a successful prototype begins with a clear understanding of the problem it aims to address. This initial phase is crucial as it sets the foundation for all subsequent steps. Identifying the problem involves conducting thorough research to comprehend user needs and market requirements. Through various methodologies, such as user interviews, surveys, and competitive analysis, teams can gather valuable insights that shape the direction of the prototype.
One effective approach to identifying the problem is the Design Thinking framework, which emphasizes empathy and user-centricity. By immersing themselves in the user’s environment, designers can uncover pain points and areas of improvement. Understanding these issues from the user’s perspective ensures that the prototype will address real needs, enhancing its overall effectiveness.
Once the problem is clearly defined, the next step is to set specific, measurable, and achievable goals for the prototype. These goals should be aligned with the identified user needs and market requirements. Setting clear objectives not only provides direction but also helps in evaluating the prototype’s success. Goals can range from improving usability and functionality to addressing specific technical challenges.
Additionally, it is essential to consider the broader context in which the prototype will operate. This involves analyzing market trends, competitor products, and technological advancements. By doing so, teams can ensure that their prototype remains relevant and competitive. Utilizing user research methodologies, such as persona creation and user journey mapping, can further refine the goals and ensure they are user-centric.
In summary, the initial stages of creating a prototype involve a deep dive into understanding the problem and setting clear, achievable goals. By leveraging frameworks like Design Thinking and robust user research methodologies, teams can ensure that their prototype is well-positioned to address user needs and succeed in the market.
Brainstorming and Conceptualizing
The initial step in creating a prototype involves thorough brainstorming and conceptualizing. This phase is crucial as it sets the foundation for the entire project. Effective brainstorming sessions are essential in generating innovative ideas and laying the groundwork for a successful prototype. To ensure productive brainstorming, it is advisable to employ various creative thinking techniques and tools.
First, consider organizing structured brainstorming sessions with your team. During these sessions, encourage open dialogue and the free flow of ideas without immediate criticism or judgment. This environment fosters creativity and allows for a diverse range of ideas to emerge. Implementing mind maps can be particularly helpful in visually organizing thoughts and identifying connections between different concepts. Mind maps can serve as a visual representation of ideas, making it easier to explore various angles and possibilities.
Collaboration is another key element in this phase. Engage team members from different departments to provide unique perspectives and insights. Diverse viewpoints often lead to more innovative solutions. Utilizing online collaboration tools can facilitate seamless communication and idea sharing, especially in remote or hybrid work settings. By leveraging these tools, teams can document ideas in real-time and ensure that all contributions are captured effectively.
Once a wide range of ideas has been generated, the next step is to narrow them down and choose the most viable concept for the prototype. This can be achieved through a combination of voting, ranking, and feasibility analysis. Evaluate each idea based on criteria such as potential impact, resource availability, and alignment with project goals. By systematically narrowing down options, you can focus on developing a prototype that is both innovative and practical.
For additional resources on creative thinking techniques and brainstorming tools, consider exploring Mind Tools and Creativity at Work. These platforms offer valuable insights and methodologies to enhance your brainstorming sessions and optimize the conceptualization process.
Creating a Prototype Plan
Creating a detailed plan is a critical step in the prototype development process. A well-structured plan ensures that the project stays on track, within budget, and meets the intended objectives. Initially, it is essential to define the scope of the prototype. This involves identifying the key features and functionalities that the prototype must demonstrate. Clear scope definition prevents scope creep and ensures that the development team remains focused on core objectives.
Resource allocation is the next crucial element. This involves determining the human resources, tools, and technologies required for prototype creation. It is advisable to list out the skill sets needed and ensure that the team members possess these competencies. Additionally, hardware, software, and other technical resources should be identified and procured in advance.
Establishing a timeline is fundamental for managing the prototype development process efficiently. A detailed timeline includes milestones and deadlines for each phase of the project. Break down the timeline into smaller, manageable tasks and assign specific deadlines to each task. This approach not only facilitates better tracking of progress but also helps in identifying potential bottlenecks early on.
Budget planning is another critical aspect. Outline the estimated costs associated with resources, tools, and any other expenditures. It is prudent to include a contingency fund to cater to unforeseen expenses. A well-planned budget ensures that the project does not face financial constraints midway.
Leveraging project management tools and methodologies can significantly enhance the efficiency of the prototype development process. Agile and Scrum methodologies, for instance, promote iterative development and frequent reassessments, ensuring that the prototype evolves in alignment with user feedback and changing requirements. Utilizing tools like Trello, JIRA, or Asana can assist in task management and collaboration. These platforms offer features such as task assignments, progress tracking, and communication channels, which are vital for maintaining project momentum.
For further assistance, consider exploring project planning guides and templates available online. These resources provide structured frameworks and best practices that can be tailored to fit the specific needs of your prototype project. By adhering to a comprehensive prototype plan, the development team can effectively navigate the complexities of prototype creation and achieve the desired outcomes.
Designing the Prototype
Designing a prototype is a critical phase in product development, bridging the gap between conceptualization and realization. The process typically begins with wireframing, a low-fidelity representation of the product that outlines the structure and layout. Wireframes are essential for visualizing the basic components and their interactions without delving into design specifics. Tools like Balsamiq and Figma are popular choices for creating wireframes due to their user-friendly interfaces and robust functionality.
Once wireframes are approved, the next step involves creating mockups. Mockups are high-fidelity designs that incorporate visual elements such as colors, typography, and imagery. These designs give stakeholders a more realistic view of the final product. Tools like Sketch, Adobe XD, and Figma are widely used for this phase. Each tool offers unique features; for instance, Sketch is renowned for its vector editing capabilities, while Figma excels in real-time collaboration.
During the design process, adhering to best practices in user interface (UI) and user experience (UX) design is paramount. UI design focuses on the aesthetics and interactive elements of the product, ensuring it is visually appealing and intuitive. Conversely, UX design emphasizes the overall user journey, aiming to make the product as user-friendly and efficient as possible. Incorporating principles such as consistency, accessibility, and feedback can significantly enhance the design’s effectiveness. Resources like Nielsen Norman Group’s UX principles and Material Design guidelines offer valuable insights into best practices.
External resources can be incredibly beneficial for designers seeking to refine their prototypes. Tutorials on platforms like Coursera, Udemy, and YouTube provide in-depth guidance on using design tools and mastering UI/UX principles. Additionally, websites such as Smashing Magazine and A List Apart offer articles and case studies that can inspire and inform the design process.
In conclusion, designing a prototype involves a structured approach that starts with wireframing and progresses to high-fidelity mockups, all while adhering to UI/UX best practices. Utilizing the right tools and resources can streamline this process and ensure the creation of an effective and user-centric product.
Building the Prototype
Building a prototype is a crucial step in the development process. It involves turning conceptual designs into tangible or digital forms that can be tested and refined. The method chosen for prototyping largely depends on the nature of the product being developed. For software products, coding is the primary method for creating a functional prototype. Developers use programming languages and development environments to construct a working model that can be tested for functionality and usability.
For physical objects, 3D printing has become an increasingly popular technique. This method allows for rapid production of physical prototypes by layering materials based on digital models. It is particularly useful for creating complex geometries that would be difficult or time-consuming to construct using traditional manufacturing methods. Prototyping kits are also available for various domains, providing pre-assembled components that can be easily configured to create prototypes of electronic devices or mechanical systems.
Iterative development is an essential aspect of the prototyping phase. This approach involves creating a prototype, testing it, gathering feedback, and making necessary modifications. This cycle is repeated multiple times to refine the prototype and ensure it meets the desired requirements and specifications. Iterative development helps in identifying potential issues early in the process, reducing the risk of costly changes later on.
Several online resources offer step-by-step guides and tutorials for various prototyping tools and techniques. For instance, platforms like Instructables and Thingiverse provide comprehensive tutorials on 3D printing, while GitHub contains numerous repositories with sample code and documentation for software prototyping. Leveraging these resources can significantly streamline the prototyping process, allowing developers and designers to focus on innovation and quality.
Incorporating these methods and resources effectively can lead to the successful creation of a prototype, providing a solid foundation for further development and eventual product launch.
Testing and Refining the Prototype
Once a prototype is developed, the next crucial step is testing to gather valuable insights and identify areas for enhancement. Various testing methods can be employed, each offering unique benefits. User testing, for instance, involves real users interacting with the prototype to provide firsthand feedback. This method is highly effective in understanding how intuitive and user-friendly the prototype is.
A/B testing is another powerful technique where two versions of the prototype are compared to determine which one performs better. This method is particularly useful in refining specific features or design elements by presenting different variations to users and analyzing their preferences. Usability testing, on the other hand, focuses on the overall ease of use and the user experience. It aims to uncover any obstacles or challenges users might face while navigating the prototype.
To effectively analyze feedback, it is essential to collect both qualitative and quantitative data. Qualitative data, such as user interviews and observational notes, provide deep insights into user behavior and preferences. Quantitative data, derived from metrics like click rates and task completion times, offer measurable evidence of the prototype’s performance. By combining these data types, a comprehensive understanding of the prototype’s strengths and weaknesses can be achieved.
Refining the prototype based on feedback involves iterative cycles of testing and enhancement. This process ensures that the prototype evolves to meet user needs more accurately. Tools such as UserTesting and Optimizely can facilitate efficient testing and refinement procedures. By leveraging these resources, developers can streamline the process of gathering feedback and implementing necessary improvements.
Ultimately, the goal is to create a prototype that not only meets the initial objectives but also delivers an optimized user experience. Through diligent testing and refinement, the prototype can be transformed into a polished and functional product ready for launch.
Finalizing and Presenting the Prototype
Once the prototype is developed, the next crucial step is to prepare for its presentation to stakeholders. This phase is pivotal as it not only showcases the prototype’s functionality but also aims to persuade stakeholders of its potential. To create a compelling presentation, it is essential to integrate storytelling techniques, utilize visual aids effectively, and emphasize the prototype’s key features and benefits.
A successful presentation begins with a well-crafted narrative. Storytelling can engage the audience, making the prototype more relatable and its vision clearer. Start by outlining the problem the prototype aims to solve, followed by demonstrating how the prototype addresses this issue. Highlighting real-world scenarios and user personas can add depth to the story, making it more impactful.
Visual aids are another vital component in presenting the prototype. High-quality images, diagrams, and videos can illustrate the prototype’s functionality and design, making complex concepts easier to understand. Interactive demonstrations, if feasible, can provide stakeholders with hands-on experience, further solidifying their understanding and interest.
When highlighting the key features and benefits of the prototype, be concise and focus on the aspects that add the most value. Discuss how the prototype stands out from existing solutions and the advantages it offers. Quantifiable benefits, such as time savings, cost reductions, or enhanced user experience, can be particularly persuasive.
Handling feedback during the presentation is equally important. Be open to questions and critiques, as they can provide valuable insights and demonstrate your willingness to iterate and improve the prototype. It’s beneficial to prepare responses in advance for potential queries and to have a plan for incorporating feedback into future development stages.
For those looking to enhance their presentation skills further, resources such as [Presentation Skills Guide](https://www.example.com) and examples of successful prototype presentations can be invaluable. These resources offer additional tips and strategies for delivering a polished and professional presentation.
In summary, finalizing and presenting the prototype effectively requires a combination of strategic storytelling, engaging visual aids, and a focus on key benefits. By preparing thoroughly and embracing feedback, you can significantly increase the likelihood of stakeholder buy-in and pave the way for the next steps in product development.
